Friday, September 25, 2015

ABRACADABRA!

I have just finished making some magic wands!  First, I made my 3 year old grand-daughter some fairy wands.  I looked at several Pinterest boards first.  I modeled most of my design after the one found on this blog.  I first bought several "cooking chopsticks" from Amazon.  Cooking chopsticks are longer (18") and are the perfect shape and length for wands!  I painted one of the wands pink and one blue then I sprayed them with Krylon glitter blast for effect.  I cut several different kinds of ribbons all the same length.  I wanted the ribbons to be long and flowing.  I used washi tape to secure the ribbons to the chopsticks and then painted a bit of Mod Podge on top for durability.  Here is how they turned out:


I think she will LOVE them!

Next, I got to work on some for her older sister who is 9.  She is a Harry Potter fan, so I again turned to Pinterest for ideas and it did not disappoint!  Almost all of the pins I found suggested using the same "cooking chopsticks" and hot glue to make the designs on the wands.  Here is an example.  Basically, I used hot glue to make designs - on one of them, I used some seed beads for more texture.  I deliberately made each one different.  I then painted them with brown paint, let them dry, then went over that with stain.  When the stain was dry, I painted gold and teal accents on them for fun.  I think she will love them.  Here is how they turned out:


I had a lot of fun creating these wands for my grandkids and it was pretty easy too.  I hope they have just as much fun pretending .... too bad the wands aren't real!

Saturday, June 13, 2015

Chalk Painted Coffee Table

I picked up a small, rather neglected, coffee table.  I could see it had a lot of potential, so I grabbed it.  I have never used chalk paint before, but this looked like the perfect first project to try it on.  I was so anxious to get started on it, that I didn't take any "before" pictures.  I DID get some "during" pictures though -

Here it is with a couple of coats of white chalk paint.  I used American Decor.  The top of the table wasn't in the best shape, so chalk paint was a good fit.  Here it is all painted - looks better already.
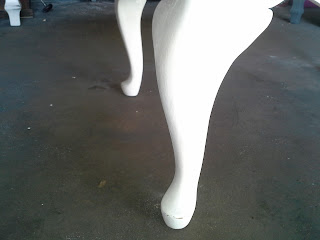
Next, I distressed the edges and the legs a little bit.  It has a lovely shell detail on the sides which, when distressed really brought out the design.
Finally, to complete the shabby chic look, I stenciled a design on the top with grey craft paint, then waxed it.
And, here is the final result - perfect for a living room, den, or covered back porch!  Currently adorable and for sale at $40.
Not so boring anymore!  What was your first experience with chalk paint?

Saturday, June 6, 2015

Shabby Chic Table Set

I recently picked up a wooden table and chair set.  It was pretty beat up and not very pretty, so I felt compelled to rescue it!  Here are some sad "before" pictures:


Then, I discovered 2 metal bistro chairs to complete the look!  I couldn't pass them up and knew they would look great when redone and would be a unique addition to this set.  Here is their "before" picture:
I started by sanding down the table top and applying a dark stain and several coats of satin polycrylic. Then I painted the legs white and distressed them.
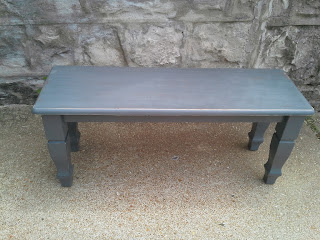
 The dark paint from the original color came through beautifully!  Then I painted the bench a deep grey color and distressed both the seat and the legs:
The two wooden chairs received a coat of deep grey as well, were lightly distressed and I added a white flower detail to the backs for interest.

Finally, I spray painted the metal bistro chairs the same deep grey color and recovered the seats with new fabric in a grey and white pattern - much better!
And here is the completed set, ready to go to it's new owner.  Priced to sell at $350 - let me know if you are interested.  Local pickups only at this time.
I love when a project turns out exactly as I pictured it in my head!  What have you been working on lately?

Monday, March 23, 2015

Vintage Market Days!

My daughter, Chelsea, and I are making plans to attend the Vintage Market Days here in St. Louis. We plan to attend on Saturday, April 24 in Chesterfield, MO.  We are both looking forward to finding some great treasures!  Stay tuned to see what comes home with us with before and after photos!  Have you ever been to Vintage Market Days?  If you are in St. Louis, we hope to see you there!