Saturday, May 17, 2014

Mason Jar Wall Hanging

I love mason jars and wanted to try one of the many ideas Pinterest had to offer.  I started with a piece of scrap fence board and then dry-brush painted it with both a little bit of gray and pink.
Next, I purchased a hose clamp which I used to attach to the wood board.  I clamped it on the jar first and then marked the center of the back of it with marker so that I would know where to nail it.  Then, I simply reattached the jar.  This makes sure that the decorative screw embellishment will be in the center of your jar. 
I printed off the word "inspire" on my computer and then used a black paint pen to write it on the board.  Then I distressed the entire board.
I finally had to choose what to put in the bottom of the jar to hold the candle steady.  I thought about using sand or pebbles but liked the idea of using buttons - here is how it turned out:
Sweet.  What would you choose to fill the jar?


Wednesday, May 7, 2014

Mercury Glass Candle Holders


I wanted to try my hand at making some DIY mercury glass candle holders.  I found several tutorials on Pinterest and tried several of them.  I eventually ended up using a combination of suggestions.  I started out by using a glass candle jar that I had on hand.  I always clean out and save the jars that my candles come in so that I can re-use them.  I just run some steaming hot water right out of the faucet into the jar and let it sit, the wax usually pops right out and then I use hot soapy water to clean out the remaining residue.
The one thing that all of the tutorials had in common was using Krylon Looking Glass Spray - after that, they all differed just a little bit.  I also used a small spray bottle containing 50% water and vinegar.  I tried spraying the KLGS first followed by the water/vinegar and also the opposite.  Personally, I prefer using the KLGS first, then lightly spraying with the water/vinegar, then using a dry paper towel to dab at it in spots to give it the look that you want.
I found that using a small drinking glass covered in a plastic bag to hold the jar up while I painted it helped a lot.  I could easily turn it as I painted.  The paint dries quickly so you need to work fast.
Here is the final outcome -

It turned out really well.  I love the look of mercury glass but it is usually pretty pricey.  This is definitely more in my price range, lol - and the sizes and shapes of the candle holders, vases, whatever, is unlimited!  How about you - have you tried diy mercury glass?  If so, what is your preferred method?


Sunday, April 20, 2014

Happy Easter 2014!

Happy Easter to you and your family!  He is risen!  Enjoy the beauty around you today and remember today and every day that God is everywhere - we just have to open our eyes and take Him in!
God bless!


Tuesday, April 8, 2014

The Little Red Chalk Board that Could!

This is the last chalk board project I will be working on for a little bit.  Another thrift store find that started out like this:
I quickly took this apart and painted the wooden frame a barn red color.

And distressed the edges a bit for a worn finish - because I can't help myself!
Spray paint the glass with some chalk board paint and you are D-O-N-E!  Easy peasy!
A quick and easy project!


Tuesday, April 1, 2014

Burlap Rosette Wall Hanging

Once again, I am starting with a thrift store picture frame find.  This one wasn't awful to begin with.  At one time, it was actually pretty cute, but over time it became scuffed and dirty and was eventually donated to the thrift store - so, I snatched it up.  Here is the before:
Since there was writing and pattern on this one, I started out by spraying it with primer.
Since there were indentations where the original frame was two toned, I decided to keep that same look with my project.  I used frog tape for delicate surfaces to tape off the small middle sections.  I used an xacto knife to trim the edges.
I painted the main sections a soft olive green color using craft paint and then painted the small middle sections a soft pink and dry brushed the olive color on top of it.

Next, I selected some coordinating scrapbook paper that I already had on hand to put in the opening of the frame behind the small piece of glass in the center.
I then made a burlap rosette following the same instructions from this post.  I hot glued it to the center of the glass - and it turned out SO cute!

So much fresher and cleaner!  I love the two toned look - it has a happy feel to it!


Thursday, March 27, 2014

Small, Ornate Turquoise Memo Board

Another great picture frame find at my local thrift store.  You can pick these up for 50 cents up to $2.00 and just let your imagination go crazy.  Here is the before picture:
The frame has a goldish hue and I immediately thought of doing a turquoise dry brush finish on it to give it a rustic, almost verdigris feel to it.  So I just took a tiny dab of turquoise craft paint and wiped it off on a paper towel to get most of the paint off and dry brushed right onto the frame.
Next, I used my staple gun to attach some chicken wire to the back of the frame.
And then, of course it needed an embellished clothes pin to finish it off!
This turned out exactly as I imagined in my head!  I love it when that happens!  Don't you??


Monday, March 24, 2014

Red Memo Board

While on a Goodwill run, I found this ugly picture - but I liked the wood frame and it's overall shape.  I almost never see the actual pictures in a frame when I am at a thrift store, I only see what it COULD be with a little bit of TLC.  Here she is in her "before" state:
I thought she would make a fantastic memo board with a little paint and some chicken wire!  So, I started by painting it a barn red color.
Then I distressed it to give it more of a worn look.

Then I added some fun clothes pins that I painted and then glued cute buttons on the end, along with some scrap paper hearts.
Here's a close up of the clothes pins/hearts:

So, there you have it - what started off as an ugly picture in a frame turned into a charming and useful memo board!  Do you see frames and not pictures when you go to a thrift store too?


Saturday, March 22, 2014

Signs of Spring!!

Last Fall, I planted tulip bulbs.  I absolutely LOVE tulips - I wish they would bloom all summer long.  Anyway, as soon as I planted them I knew that I'd be looking forward to Spring even more than normal this year just so that I could see them sprout.  I am happy to say that they are sprouting - no flowers yet, but they are sprouting! 
I can't wait until this whole area beside my wheelbarrow in my rock garden is filled with tulips!  Did you plant any bulbs last Fall that you are waiting to sprout?  Are they sprouting?  What's your favorite?

Thursday, March 20, 2014

Small Tabletop Chalkboard

While at my local Goodwill, I came across a little picture frame for a dollar.  This is how it started out-
I started by taking the frame apart and painting the glass with 3 coats of chalkboard spray paint.
Then, using some craft paint, I painted the front and back of the chunky wooden frame a fun turquoise color, got some chalk, and added "faith, hope, love" to the front.  Now it is a fun accent piece!

I'm loving the fun chalkboard ideas floating around.  You can make just about anything into a chalkboard!  I am gearing up for my first flea market booth in May, so I have been busy making all kinds of goodies to sell.  What have you made into a chalkboard?  Are you addicted to them too?


Tuesday, March 18, 2014

Lathe Heart Wall Hanging

I was given a bundle of lathe boards.  You know, the kind that live behind your walls in older homes?  I bet you don't give them a second thought do you?  Neither did I.  They were full of nails, but they came right out with no problem.
I chose 3 boards and marked them off at the center and cut them in half.
Next, I cut a couple of smaller pieces to attach to the back to hold it together.  I used Gorilla Glue to secure it.
Use some heavy stuff to pile on top until the glue sets.
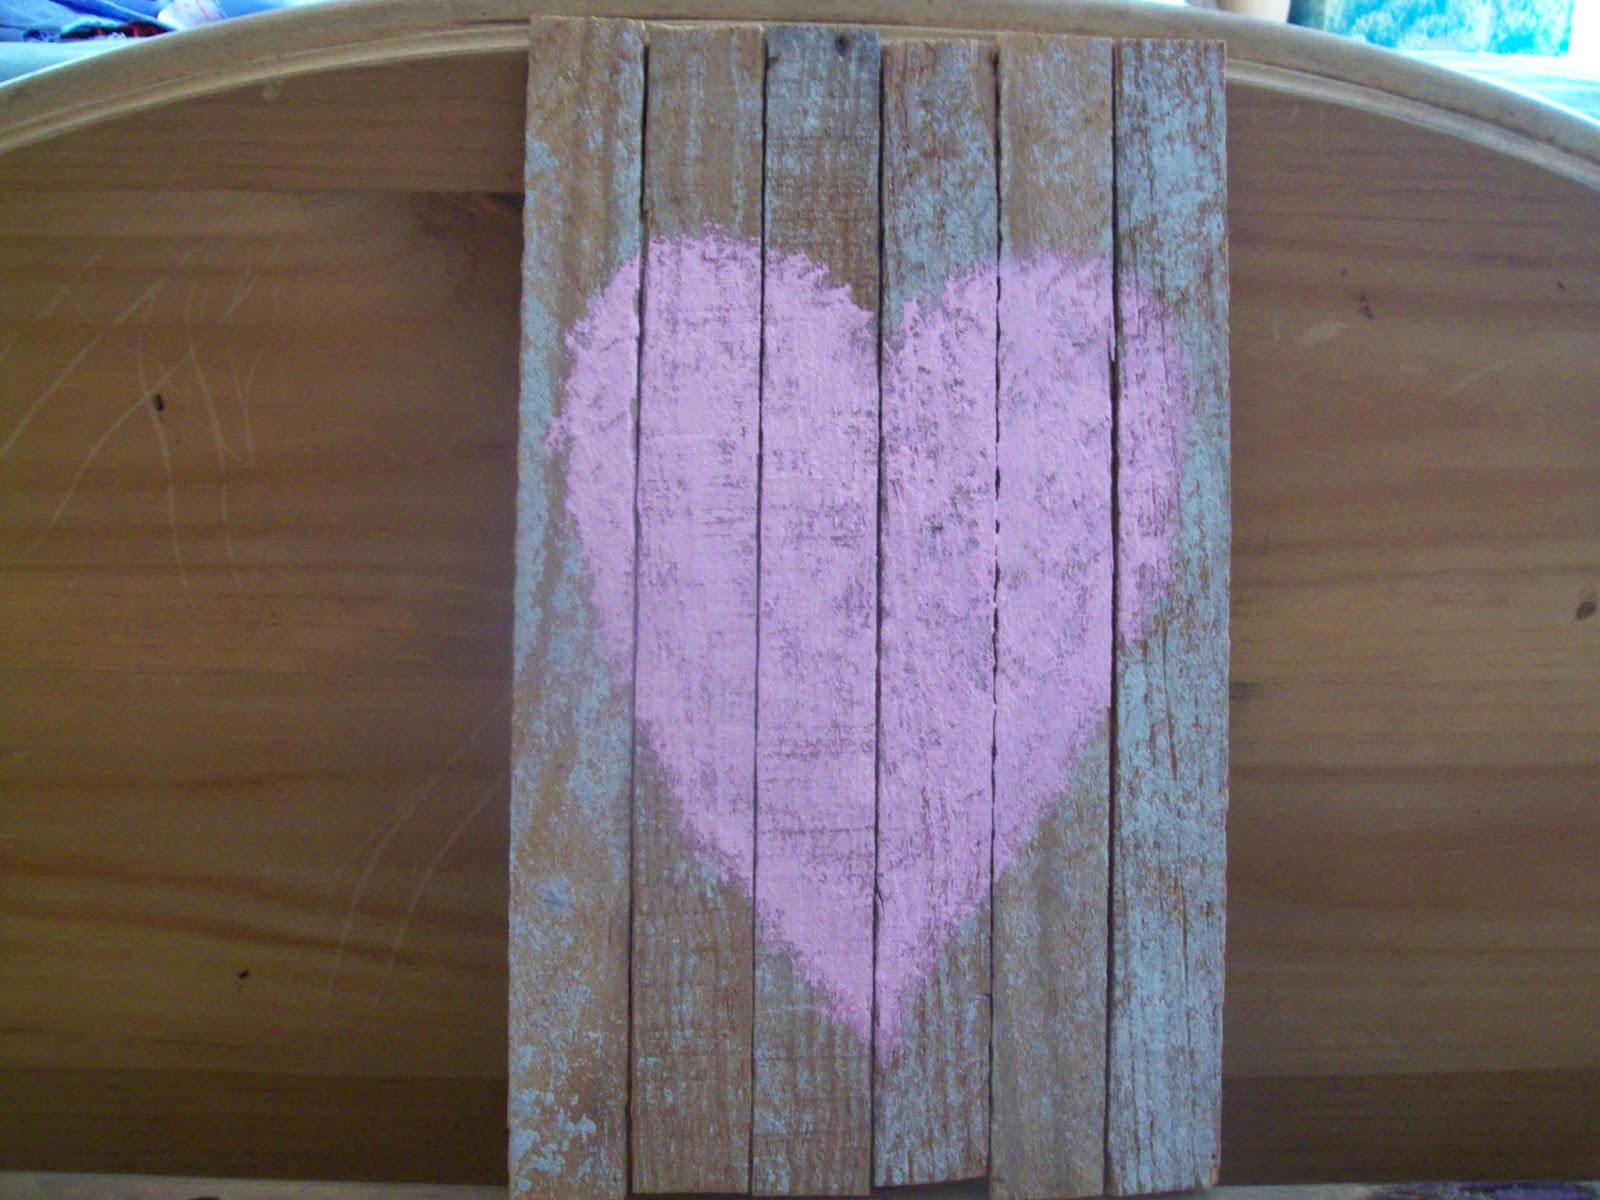
On one side of the boards there was a worn white finish which I thought would be the perfect canvas for a rustic, shabby, pink heart.  The boards are not perfectly aligned which was partly on purpose and partly because I haven't quite mastered my circular saw, lol.  It doesn't matter much for this project because I was going for a rustic element anyway.
I started by just free-handing a heart shape using craft paint and a stencil brush.
Then I just filled it in and kept adding layers until it was the shade I wanted it to be.
I added a twine hangar to the backside with my staple gun and hung it beside my bed.  Love it.
I know there are so many uses for pallet wood and I've seen a lot of posts using paint stir sticks, but I'm loving these lathe boards - has anyone else used them?  Any other unusual wood sources you've used?  If someone hadn't thought to bring me these, I never would have thought about using them.