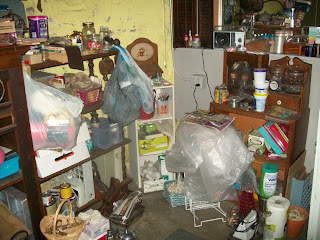
When I say "beginnings" - that is the absolute truth! Of course, when you see the "before" pictures you will better be able to appreciate that beginning is better than nothing. Here is the mess I started with:
I know, it's pretty awful! I've just been collecting things and stashing them randomly and it got really out of hand really fast, lol. I have been crushing on all the beautiful craft rooms on Pinterest (you can visit my board to see all of the lovely spaces). I know that having an unfinished basement will make it difficult and expensive to have spaces as wonderful as some of those, BUT I think I can at least improve on what I have - which wouldn't be too hard given the mess I started with, lol.
So, I started with a curbside find of this cottage shabby hutch top and knew that I wanted to use it to organize my craft supplies. There is a smaller hutch too which I am going to use in the play room - more on that in another post. I put it up on top of a couple of small shelves and then put a shabby white slatted board on top to be the base (which was another curbside find). Then I dug through all my containers and started filling it up.
SO much better. I still want to put some labels on things and further organize this space, but you have to start somewhere, right? Here is the space to the right -
Above this space is a large mirror which I am using as kind of a room divider between this space and the rest of the basement.
Above the space is a rusty plant hanger with pink prisms hanging from it for some shabby bling!
It still has a long way to go before I call it "done", but I feel much more inspired to continue to organize it. Plus it has prompted some organization in other parts in the basement as well. I will share more as things as they get done! Do you have a designated crafting area? Where did you get your inspiration? Any good storage ideas?
Monday, July 29, 2013
Thursday, July 18, 2013
Shabby Black Desk
I acquired a curb-side find - a wooden desk. It started out looking like this:
It had great structure, but just needed some TLC. So I gave it a coat of black paint (Behr, Black Suede) and distressed it. I also lined the little drawer with some cute contrasting fabric and bought some new drawer pulls in brushed nickel.
It had some shelves on the side and I found some great little black baskets that fit perfectly at Family Dollar.
The end result was a cute little desk with plenty of storage!
Quite a transformation! I love how it turned out. I almost kept it for myself, but it sold right away.
Tuesday, July 9, 2013
Shabby Blue Nightstand
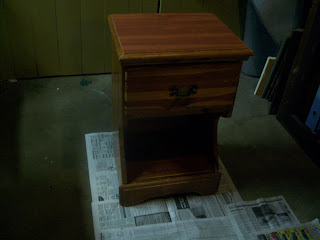
Here is a fun before and after of a curbside nightstand. It started off like this:
Not cute at. all! But I thought a little blue paint might liven it up a bit and it sure did!
Looks better already. Then distress the edges a bit -
And add a cute porcelain knob along with an orange stenciled flower, and viola!
Much, much better I think! I like using stencils on furniture as well as walls - what have you stenciled lately?
Not cute at. all! But I thought a little blue paint might liven it up a bit and it sure did!
Looks better already. Then distress the edges a bit -
And add a cute porcelain knob along with an orange stenciled flower, and viola!
Tuesday, July 2, 2013
Burlap and Orange Curtains
To go along with the color scheme in the play room, I decided on a fun orange print with burlap panels. I want to keep the room gender-neutral since both my grandSONS and grandDAUGHTERS will be playing there. I like the contrast it brings to the room.
Since the burlap doesn't do much in the area of privacy, I first hung a brown bath towel to block some light. I left some room at the bottom for some light to shine through while still providing adequate privacy.
You can't see the towel much when the burlap is hung, so it is an inexpensive solution to the problem!
Subscribe to:
Posts (Atom)


